Pressed Flowers: Creative Ideas and Artistry
From Childhood Craft to Creative Expression
Pressing flowers isn't just a quaint pastime; it's an ancient art form! There's evidence that people were drying and pressing flowers as far back as ancient Egypt.
Fast forward to the 16th century in Japan, where it truly blossomed into an art known as Oshibana. Samurai warriors even practised it to cultivate patience, focus, and a deep connection to nature—how cool is that? The craft eventually spread to Europe and became hugely popular during the Victorian era, particularly among women. It’s wonderful proof that the enjoyment of pressed flowers has indeed spanned centuries and cultures!
.
A Renewed Appreciation for Pressed Flowers
I've been creating pressed flower art for years, long before the recent resurgence in popularity, so it’s wonderful to see these traditional crafts gaining new appreciation.
Using plants in my creations has always been a passion of mine, and pressing flowers offers a beautiful, sustainable way to preserve and repurpose my harvest. It enables you to appreciate their seasonal beauty well after they've faded from your view, allowing you to create keepsakes that hold special memories.
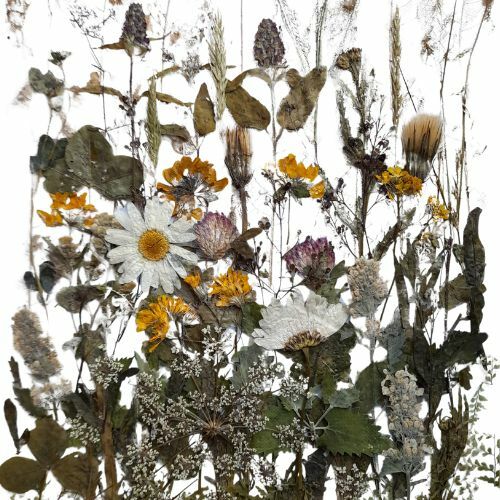
My personal favourite technique is building up layers of pressed flowers and foliage. By mimicking how plants grow in the wild, I can add incredible depth and realism to my pieces—it’s like painting with nature!
 .
.
.Beyond the Basics: Creating High-Quality Pressed Flowers
While pressing flowers is a common childhood activity, creating them for commercial use or high-quality art requires much more time, effort, and technique.
When the opportunity arose through Otorohanga Creative Conduit to share my craft, I jumped at the chance to offer a dedicated pressed flower workshop. Having perfected my skills over time, I was ready to guide others on their pressing journey!
At the workshop, I shared key techniques and helped participants identify easier-to-press varieties. Factors like petal colour, fleshiness, receptacle structure, and petal attachment all influence how well a flower presses. It was a great way to highlight the real-time commitment involved in creating that professional, high-quality look.
.✨ From Pressing to Placement: Workshop Techniques and Tips
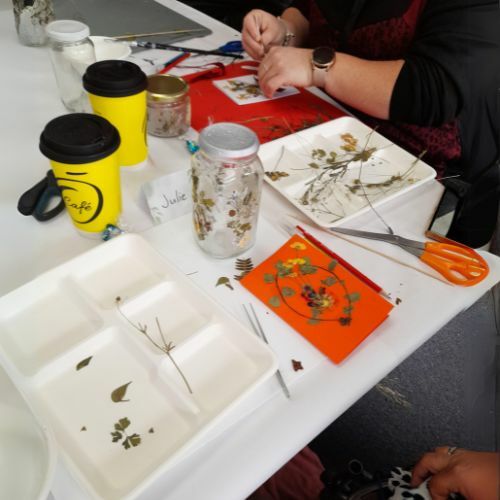
With only two hours to cover so much, I only touched on the various application methods, which use different glues (Mod Podge, acid-free glue, superglue, hot glue, PVA) to achieve specific finished looks.
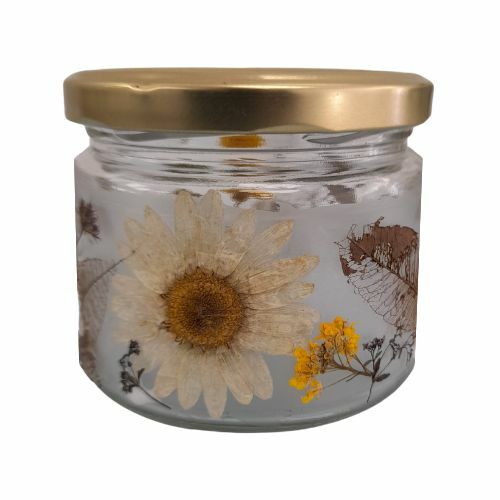
For the demonstration, I focused on the simplest method: using diluted PVA glue and jars. The process is straightforward: an initial layer of glue, careful placement of your foliage, and a final layer of glue to seal the artwork. PVA is fantastic because it dries to a nearly invisible finish.
Tips for Arranging:
When arranging your project, you must think ahead and consider the layering of material carefully. Once glued down, pressed flowers become incredibly delicate and are very difficult to reposition without damage. Once the participants finished their jars, they had a quick go at a greeting card. If we’d had more time, they could have gotten more creative, but I think everyone learned a lot and thoroughly enjoyed the process!
.
Planning and Preservation: Getting the Best Results
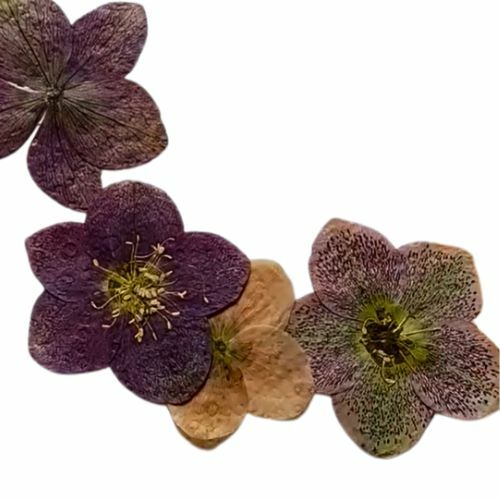
Colour preservation is a key consideration. Sadly, white flowers often turn brown during pressing, while darker colours usually turn out much better. Techniques do exist to address tricky flowers: you can separate and press petals individually, then reassemble them once dry. Recolouring can also be used to enhance the final look.
Timing is Everything
Crucially, picking flowers at the right time is paramount. Flowers with morning dew are very likely to go mouldy, and overly mature blooms will collapse more readily. Younger blooms, picked at the peak of their beauty, yield the best, most vibrant results.
Your Pressing Method
There are several ways to press your plants: the traditional old book or flower press with wing nuts, or newer methods like using a microwave, dehydrator, or silica sand. It really is all personal preference, and I suggest you try things out for yourself!
Personally, I still love using a proper flower press. Here are some key tips I’ve learned over the years:
-
Pick Wisely: Whichever method you use, cut your foliage when it's newly opened and thoroughly dry.
-
Test New Material: While finding new material is exciting, always do a few test pressings first to see how they truly turn out.
-
Absorbent Paper is Key: Use absorbent, non-textured paper (paper towels, nappy liners, Chux cloths, etc.), then newsprint, and occasional layers of cardboard. I keep my pressings in the liners they were pressed in, as I find this is the safest storage method.
-
Arrange for Even Pressing: Organise your foliage based on similar thicknesses. Extra fleshy plants will require more attention; place these thicker pieces together, not amongst less fleshy plants. Do not overlap your cuttings, make sure there is a clear margin around each piece you are pressing.
-
Consider the Final Look: Think about how you want the finished flowers to face (full frontal, sideways, etc.). How you lay the paper on top will affect how the petals lie. I lay all my flowers with the stalk at the bottom and flowers at the top; this ensures they have space to spread their petals as I cover them up.
-
Fight the Mould: If using a flower press, make sure you check and change the absorbent paper every few days to prevent mould from forming.
It’s like opening a little time capsule! After a month, it’s so much fun to open the press and see the beautiful results—there are always a few surprises, some good and others which are glorious disasters!
P.S. Want more exclusive tips on preserved foliage, seasonal plant advice, and first-look access to my new pieces? Head over to my website and sign up for my regular Kats Flora Newsletter! Here. I share deep dives and secrets you won't find on the blog.
Posted: Saturday 25 May 2024
Recent Posts
Archive
Tags
| Top |